Search

DIY TALEZ

My adventures into the world of DIY…the good and the not so good.

Category

Food Related

Christmas Cookies Diva Style….or not.

MERRY CHRISTMAS!!!

Well, I’m a week early, but considering how hectic everyone gets at this time of year, better to be early.

I thought last night I’d be a totally normal little DIY Diva and start baking some Sugar Cookies to give to friends for Christmas…I mean every ‘normal’ person starts mixing cookie dough at 6 in the evening don’t they? By the time I’d baked the first batch, waited for them to cool and clean up my explosion of mess in the kitchen it was after 9pm, so decided to put the decorating off till the morning. And again, being totally ‘normal’ I was up a little after 4am mixing up the icing batches to decorate my little goodies. I finished icing the first batch by 5.30 and have managed to clean most of that mess up!

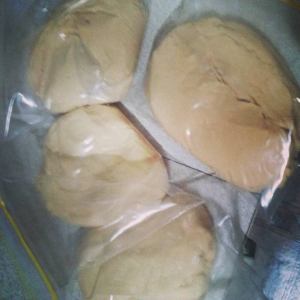
Cookie Dough in quarters

Now before anyone starts questioning my sanity of baking so late in the day, or decorating so early in the morning, please note, it is Summer here in Brisvegas. Which means during the day the last thing I want to be doing is opening an oven door with a further 200 degress blasting at me…and for the icing to not be as runny as it would be during the middle of the day, early morning is the best time to be doing it! Plus I’ve been up since 2ish, so for me it was nearly morning tea time. Gotta love being married to a night shift worker.

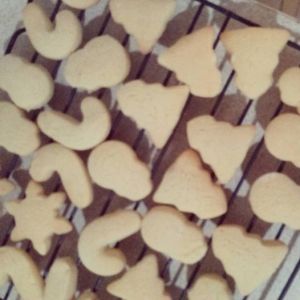
Straight out of the oven.. christmascookiesbymeMore Icing

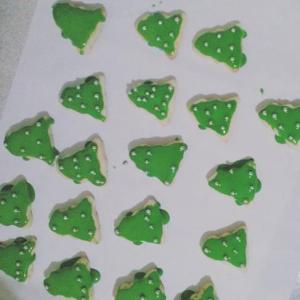
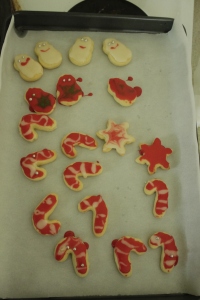
The recipe I used for these little darlings can be found here. I found it on Pinterest, along with many others, but thought I’d use this one last night…it seemed simple enough, and it actually was! It’s no-one else’s fault that my decorating skills are rather poor…closer to pathetic truth be told. But the instructions are Cari Proof to follow, so don’t let my end result put you off.

I mixed it up with a little peppermint flavouring added to the dough, along with vanilla…and added rosewater flavour to the red icing, peppermint to the green icing. My little hint/cheat would be to use baking paper to do the icing on. Easy as to clear away when you’ve finished. And having tested one…oh ok, two, I’ve tested two cookies…hmmmm, YUM!!! Glad none of our friends are giving these to us, coz the hips would be spreading for sure!

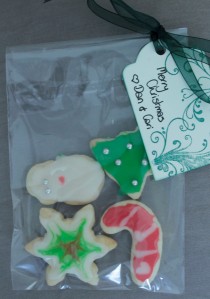
Ready to gift.. :)

Now to bag these goodies up, add a personal tag and they’ll be ready to share with everyone!! Otherwise I might not have the self control to prevent myself from testing some more!!

Christmas Baking and cooking nearly mapped out.

This year I’m going for the more ‘homey’ Christmas style of gifts and food. We’re not going the Traditional Roast for lunch, as here in Brisbane it’s normally a sure thing the weather is going to be hot and steamy enough without turning the kitchen into a sweatbox.

So this week, while I’m prepping and checking the decos and lights, I’m mapping out recipes to attempt for Christmas Lunch as well as for gift ideas.

So I’m back to trawling through Pinterest on the hunt for new ideas and tips…my icing skills are in serious need of improvement or total overhaul. Either way works for me.

So far, without really looking, I’ve found a few great sites which I’m about to share with you. These make it all look sooo easy, nearly Cari Proof…time will tell. As will my patience levels. hmmmm.

Ok, first link is here. This is from Glorious Treats and is a real treat to read.

pastel-snowflake-cookies
Photo credit to Glorious Treats.

Another which I’m keen to try from Keep It Simple, Keep It Fresh is Gluten Free Spritz Cookies. Maybe I’ll make these up into mason jar gifts for those we know who can’t enjoy the run of the mill goodies because of Gluten. Possibilities…worth keeping in mind, but I’ll try them out on The Man first and see what he thinks. Ssssh, won’t tell him they’re GF, just see what he thinks. The link for this one is here.

And a great tip for icing monogram letters is found here. Ok, this was originally for Valentine’s Day, but no reason it can’t be adapted, and the tip on icing is certainly worth keeping for a rainy day. This one is from Sweet Dreams, a great launching pad for learning new cake decorating tips.

I’ll leave it at that for today…got to hunt through some recipe books and magazines that have been (sadly) collecting dust for the better part of a few months to find some more goodies. Let’s just say, The Man is going to be eating like a king for the next few weeks while I trial a number of recipes. Thank goodness he’s got a sweet tooth!

Pink Afternoon Tea for Boobies

Apologies for the rather long time between Posts. Been a little choatic over here over the past month or so, mostly with fun and a few games. Am hoping between now and Christmas I can grab a day or two to myself to indulge in my DIY Diva-ness.

One of the really enjoyable events lately was my Afternoon Tea @ The Blue…which was more pink than anything…as a fundraiser for Breast Cancer Awareness. I even managed to whip up a small refashion for a new skirt and a top to go with!

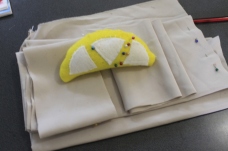
BCA Top in the making BCA Top & refashioned Skirt

One thing I really learnt, NEVER EVER host a fundraiser right after a Card Class!! Big day is an understatement, but it was lovely to spread the fun from the morning to the afternoon.

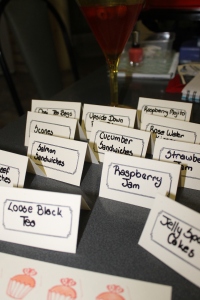
Choc Dipped Strawberries & Mini Bounty Bars setting in the fridge Embossed Menu Cards

The Menu included;

Salmon & Cucumber Sandwiches

Rosewater Mini Kisses with Choc surprise

Choc Dipped Strawberries

Grapes

Mini Bounty Bars (homemade)

Fresh Scones with Raspberry Jam & Cream

Pink Upside Down Pear Cake

Hawaiian Hibiscus Loose Leaf Tea

Raspberry Mojito Loose Leaf Tea

Black Loose Leaf Tea

Chia Teabags (I cheated a little!!)

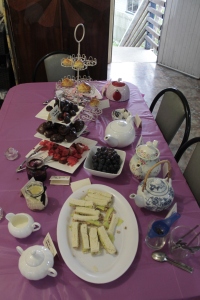
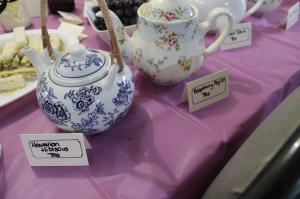
Table Layout I'm a little teapot...

Sadly my mini Jelly Cakes didn’t turn out so great…still not used to our new-ish oven.

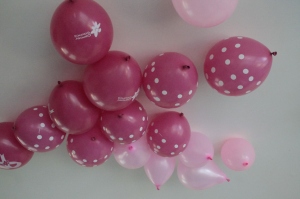
Balloons!!

Now I will openly admit, I’m no Martha Stewart…and that was made rather clear to me the day prior when I was attempting to unfurl/poof up the Puffy Garlands to decorate the lounge. Took a lot longer than I expected that’s for sure! Worth it for the overall look, but talk about frustrating!

Setting up Garlands

Also managed to use some tulle to hold the balloons to the weights. Sadly, I didn’t realise our Helium wasn’t as long lasting as the party supply stores supply, so the balloons we did up the day before weren’t at their best when they needed to be. Oh well, live and learn.

Nearly there

All in all, a great day, great laughs..awesome food which The Man enjoyed eating afterwards. He won’t do High Tea per say, but he’ll eat the food no worries!

Till next time…which won’t be too far off I promise. xx

Rosewater Flavoured Choc Filled Meringue Kisses

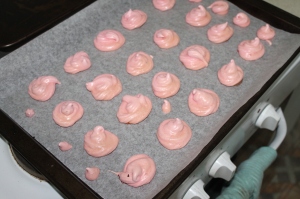
Straight out of the oven.

I’m rather pleased with myself this morning for managing to re-create these little beauties. Thank You to Darla from Bakingdom for such an easy recipe to follow and produce. You’ll find it here if you’d like to try for yourself.

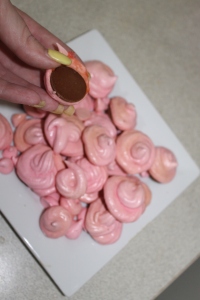
I did make a few little alterations to my version. I used Rosewater instead of Raspberry Flavouring, which has filled the house with a gorgeous scent all morning. And I wasn’t able to find any small choc buds in our local supermarket yesterday so have used buttons instead, making some of these larger than originally planned.

Choc Button base

Now I’ve never been great with meringue to be honest, but found this method to be a cinch. Took a little longer but the results speak for themselves. And even with a few little mobility hiccups, this is an easily, and quickly, made recipe. I even had a laugh to myself when I was cleaning up the piping bag…talk about a Pink Sticky Sweet Mess.

And yes, I need to work on my piping technique come to think of it. Oh well, I’ll get there one of these days…in the meantime, if it’s messy I’m there.

Enjoy!

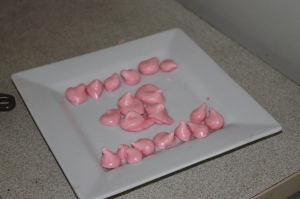
Plate of Kisses


Good old family recipes to the rescue yet again!

I’ve been itching to share this one with everyone but decided to wait until the intended eating party had an opportunity to enjoy/consume. Now for the sharing!!

IMG_6291

Last year during my travels an aunt taught me a super easy, really messy/fun, delicious dessert that is also really budget friendly. For the life of me I don’t remember the proper name, but I’ve called it the Choc Ripple Cream Log (which could be the official title!) My Gran also backed up my aunt as well as sharing an adaptation. Swap out the Choc Ripple for Gingernut/Butterscotch biscuits instead!

You will need:

packet of Choc Ripple Biscuits (or Gingernut/Butterscotch)

Large container of Cream

Mixing Bowl

Electric Beater or extremely muscled up arms to beat by hand

A drip of Vanilla Essence

1/2 Teaspoon of preferred sugar to slightly sweeten cream

Spatula/Spoon to smear cream

Platter or plate to place Log on

Toothpicks/skewers & Cling Wrap

*Optional extra – dibble of Brandy Essence for flavour

How to:

Whip your cream until stiff (combine Vanilla & Sugar at the same time)

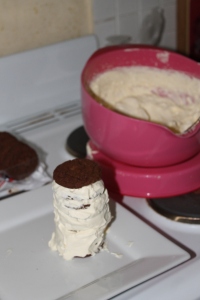
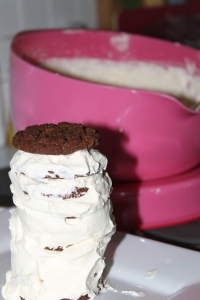
Stack your biscuits one on top of another with a generous heap of cream between each layer. Continue stacking till you have reached your desired height/length. I personally stack vertical before laying it all down on the platter to finish off. (See photo)

Choc Ripple Cream Log IMG_6290

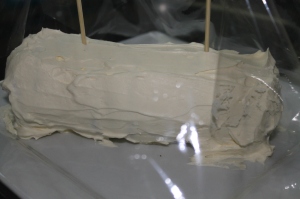
Once you have your Log at the desired length, cover the edges with cream. Place either toothpicks or shortened skewers into Log and cover with cling wrap. Use the toothpicks/skewers to keep the wrap off your cream as much as possible.

Place in fridge to harden & set. The longer the better for this stage, though the minimum seems to be at least 3 hours. I do mine overnight to be on the safe side.

To Serve:

My Aunt loves to grate Cherry Ripe bars on top of her creamy creations, Gran likes Peppermint Crisp grated on top. I’m more towards a little chocolate with fresh fruit….it’s up to you! No hard and fast rules on this one…other than ENJOY!!


Up ↑